How to Replace a Caravan Awning Skin
If your caravan awning vinyl is faded, torn, or just past its best, replacing the awning skin yourself is a very achievable DIY job — and a fraction of the cost of a full awning replacement. This guide walks you through the full process, from releasing the old fabric to winding up the new one. This guide is for roll-out awnings such as thise made by Carefree, Dometic, Awnlux, Global and Aussie Traveller.
Before You Start — Important Safety Notes
There is no single “correct” way to do this job. Caravan awnings vary by brand and age, so treat this guide as a solid framework and adapt as needed for your setup. Even then, there are other approaches to this job that are sometimes preferable or required.
Beware Spring Tension. The awning barrel contains two heavy-duty springs under high tension. These can cause serious injury, especially if tension is released all at once in an uncontrolled manner.
Two people makes this much safer and easier. It is strongly recommended to have a second person to assist you with the job. This makes the job quicker, easier and safer. Do not attempt to work with the spring tension alone if you can avoid it.
Check awning length before beginning. Double-check that your replacement awning skin matches the required length of your existing barrel before you begin. Awning skins are sized to the arms (measured centre-to-centre), but the fabric should fit within the tracks of the barrel, with approximately 50mm of spare room before each end-cap, allowing for adjustments and locating screws. Replacement fabric is typically a little longer than the old awning, which usually shrinks over time.
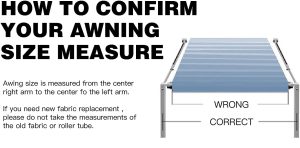
confirm awning size is correct before ordering and before proceeding with installation
Getting Set Up — Working Height
Before you lift a tool, get your awning into the right position to work comfortably and safely:
- Fully extend the awning out from the van
- Slide the support brackets (“top-arms”) into place
- Raise the awning up to approximately chest height by pusing it in towards the van (leave the usual leg-height adjusters set to lowest setting).
- Tighten the tension knobs on both arms firmly
The fabric should drape down loosely at this point. You now have safe, comfortable access to both the barrel and the roofline sail track.
Step-by-Step: Replacing Your Caravan Awning Skin
Step 1 — Release the Old Awning from the Barrel
Detach the existing awning fabric from the barrel. Depending on your awning, this typically involves:
- Removing screws at each end of the fabric attachment
- Cutting the fabric away from the barrel
- Cutting between the splines
Take note of how the fabric is attached — you’ll be reversing this process with the new skin. At the end of this step, the old fabric will be hanging down from the top-track along the side wall of the caravan.
Step 2 — Unwind the Barrel to Release the Spring Tension
Hold the barrel very firmly before you begin unwinding and rotate a little in the “roll out” direction to enable easy release of the ratchet to the “roll in” position.
Slowly let the barrel unwind, allowing it to release its spring tension in a controlled way. Count every turn as you go — you’ll need this number when it comes time to re-tension the new awning skin.
Never let go of the barrel while it still has tension. The spring inside can release violently if it gets away from you, damaging itself or injuring you in the process.
Step 3 — Unbolt the Barrel from the Awning Arms
Once all tension has been safely released, unbolt the barrel from both awning arms and set it down.
Step 4 — Remove the Splines and Old Fabric from the Barrel Tracks
With the barrel free, remove the splines and any remnant material from the barrel’s tracks. Depending on your barrel design, you may need to remove one or both end-caps (spring assemblies) to fully access the ends of the tracks.
This is a great opportunity to clean the barrel tracks thoroughly — remove any dirt, old adhesive, or debris before installing the new skin.
Step 5 — Access the Roofline Sail Track
Time to get up the ladder to access the sail track that the top of the awning slides into.
Remove the screws from both ends of the sail track — these are the screws holding the awning skin in place. Once removed, give the fabric a tug to confirm it can slide freely in the track by a few inches.
Step 6 — Remove the Old Vinyl from the Top Sail Track
Pullung from one end, slide the old awning skin out of the sail track. As the bulk of the fabric comes free, it will need to pass up and over the awning arm assembly — take your time and work carefully to avoid snagging.
Step 7 — Prepare the New Awning Skin
Before installation, thread the new spline through the top eyelet of the new awning skin. It should protrude at both ends.
New awning fabric being prepared with spline inserted into top eyelet
Step 8 — Slide the New Awning into the Sail Track
This step is best achieved with one person up a ladder at the “feed-in”end of the sail track, with the other managing the fabric from ground level. Feed the new awning skin into the roofline sail track from one end. As with removal, the bulk of the fabric needs to pass carefully up and over the arm assembly — go slowly and avoid dragging the vinyl across any rough surfaces or sharp edges that could scratch or tear the new material.
Step 9 — Attach the Bottom of the Awning to the Barrel
Now attach the lower edge of the new awning skin to the barrel:
- Start with the first with the track furthest from the van
- Have the spline in position before you begin (inserted into the spline eyelet along the awning)
- Slide the barrel onto the spline along its full length (another job made simplet with two people)
- Install the second spline using a spline press tool — instructions for this are found in the DIY kit. Ensure the fabric is located central on the barrel or in line with existing marks.
Step 10 — Reinstall the Barrel End-Caps
If you removed any end-caps or spring assemblies in Step 4, now is the time to reinstall them. Make sure everything is properly seated and secure before moving on.
Step 11 — Re-tension the Barrel and Reinstall on the Arms
This step requires care and is easiest with two people.
Position the barrel and rest it onto the awning arms. Apply tension as follows:
- Start with the ratchet end. Add the number of turns you counted in Step 2. To add turns, face the end-cap and rotate it towards you and downward — this is the “roll out” direction so the ratchet control needs to be set accordingly.
- Then tension the non-ratchet end in the same way
Once tensioned, carefully secure the barrel back onto both arms. Test the awning by rolling it in and out a few times to confirm the tension is correct and the fabric rolls evenly.
Test, adjust & lock it in!
- Loosen the tension knobs on each end to allow the awning barrel to fall into its normal position.
- Roll the awning away as normal, ensuring the arms are perpendicular to the wall and aligned with their mounting brackets. To achieve this, the new awning might need to slide alont the top sail-track a little.
- Roll the awning fully out and in at least once more, so it finds it own new resting position.
- Fit or replace screws back into the top sail track to hold the top of the fabric in its new position.
- Fit any retaining screws back into the barrel as needed.

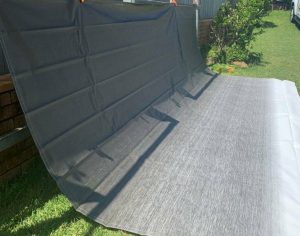
Job done — a fresh replacement awning skin completely transforms the look of your van
Need a Hand?
Awning skin replacement is a satisfying DIY job, but it’s not for everyone — especially if your spring tension is high or your barrel design is unusual. If you’d prefer to leave it to a professional, our mobile service team covers Ballina, Byron Bay, Lismore, and the wider Northern Rivers region and can come to you.
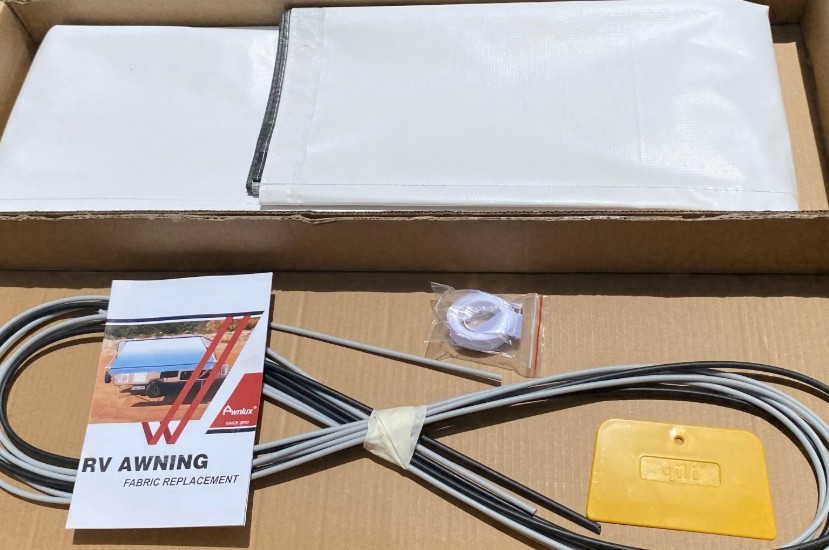
We also stock a full range of replacement caravan awning skins, awning vinyl, and spline press tools — browse our online store or get in touch if you need help measuring up for the right size.
Have questions about your specific awning setup? Drop us a message — we’re happy to help.